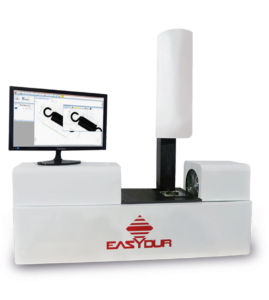
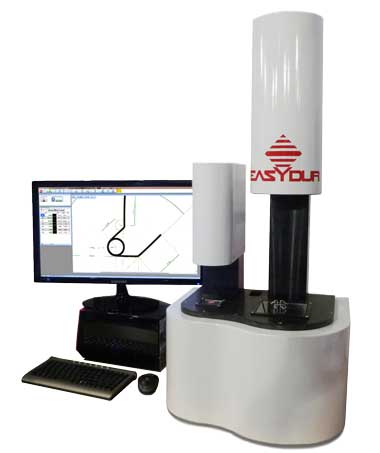
Multivision II is a profile projector capable of showing at all the programmed measures at once. It can be equipped with 1 to 3 industrial cameras, with customisable fields of view, for 3D measurement of springs and components.

Multivision II vision system: geometry par excellence
MULTIVISION II has the same functions as a classic profile projector, but with the great advantage of obtaining all the programmed measurements in an instant.
Available in a version with 1 to 3 cameras with customisable fields of vision, it is ideal for three-dimensional measurements, for example for compression, torsion, traction springs and various shaped springs.
The industrial vision system is equipped with
- a computer with 23” monitor, Easydur image analysis software based on Windows 10-11, able to manage from 1 to 3 cameras
- 1-3 cameras and respective telecentric lenses
- 1-3 illuminators for reading the profile
| Mod. Standard VH* | Field of view | Resolution | Min. Measurable thickness |
|---|---|---|---|
| Multivision II – 25 | 25 x 19 mm | ~ 0.005 mm | ~ 0.01 mm |
| Multivision II – 64 | 64 x 48 mm | ~ 0.01 mm | ~ 0.02 mm |
| Multivision II – 110 | 110 x 85 mm | ~ 0.01 mm | ~ 0.02 mm |
| Multivision II – 200 | 192 x 144 mm | ~ 0.02 mm | ~ 0.04 mm |
*Model 2V, with two vertical cameras, is personalised to suit the customer’s requirements. Model VH is usually proposed with two identical fields of vision (vertical and horizontal) but, like model 2V, it can be personalised on the customer’s request.Part recognition and self-alignment
Multivision II versione 2V

Piece recognition and auto-alignment for profile reading
The system is very open and is completely programmable, not being tied to a fixed design; it is able to recognise and automatically measure whatever shape is focussed on by the various cameras.
Thanks to the Block Tracker function, the software calculates the centre of gravity on the first measured sample and learns the data of the rotation of the part through 360°, so that the operator never has to reposition the subsequent samples.
The program has a rich database of geometrical instructions for searching for points, lines, circles, thus enabling it to assess distances, angles, bending radii, etc.
CAD-style design
The operator draws points, lines, arcs and so on just as in the CAD environment. There is no longer any dependence on the classic and difficult interpretation of the program based on a table or on function lines, all he has to do is draw the geometrical elements.
Of course there is a folder for storing programs and results.Statistics are calculated in real time and the following may be obtained for every measurement taken: Mean, Sigma, CP, Cpk, Gauss Curve, Histogram.
The data and the graphics are updated continuously, part by part, enabling the user to understand which are the most critical characteristics.
Fast and precise image analysis
The image analysis is developed entirely by Easydur and reaches a resolution of 0.1 pixel. Searches for both linear and radial patterns are implemented. The cameras are digital on a Firewire bus, with a very high resolution CCD sensor (up to 9.1 Mpix), the photo shooting times are very low and therefore allow the measurement of moving or vibrating objects, especially on the machine.


